Frameworx User Manual

FrameWorx User Manual
Introduction to FrameWorx
FrameWorx is a CMS framework that allows you to rapidly have us develop a website from the ground up using intuitive and re-usable content. To save customers time on data entry, we've created a system where chunks of content or information can be re-used on several areas - whether it be accross multiple pages, social media, or anywhere else in the system. These snippets of content are referred to as blurbs, which can be tagged for use for several occasions with blurb types, which all ultimately get output into your pages, navigation structure, and call to action areas.
Global Functions
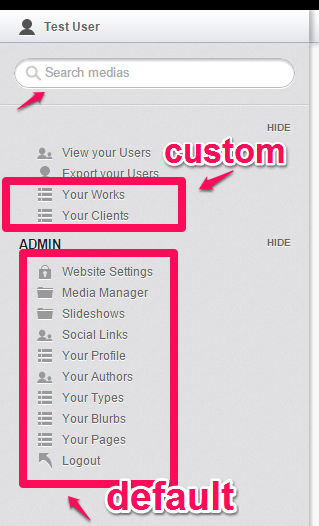
When you log into your FrameWorx admin panel, you will first land on a page where you can add and edit blurbs, with a sidebar to navigate on the left hand side. On the top left, you can view and export your customers who are registered on your site, and just below it there are any custom admin interfaces that MyRamani has provided for you as a client. Below that is the master admin navigation bar, this is the area every customer using Frameworx sees and uses in their own custom website. The "search" bar on the top left allows you to search any section in the admin panel you're in for what you're looking for.
Blurbs
Blurbs are re-usable chunks of content or information that can be used in various scenarios accross your site. Each blurb has a regular, short and long version of itself. This is because the same term can be presented to the user in different ways based on factors such as the device they browse the website with, the current page they're viewing and how applicable it is on that page, and the amount of space you might have to show that information. For example, the term "contact us today" can also be spelled out as "click here to get a quick and free quote" or simply "contact us" as its short version. This allows the user to change the way text is presented in three different ways, from one area in the admin interface. This essentially eliminates the need to edit page's HTML code directly using a WYSIWYG editor as most other CMS platforms are setup, causing no stress with broken layouts, having to edit multiple pages that contain some similar information, or bloated source code from the editor itself .. making it fit your website's design perfectly. FrameWorx does also offer an editor for pages as well.
Each blurb also has a "type" that can be associated with it, some default types are setup which are discussed more in the Types section. This allows this piece of information to be used in several places. For example, in our navigation menu, we might want to display the short version, on our sidebar the long version, and the regular version as the heading of the contact us page.
Managing Blurbs
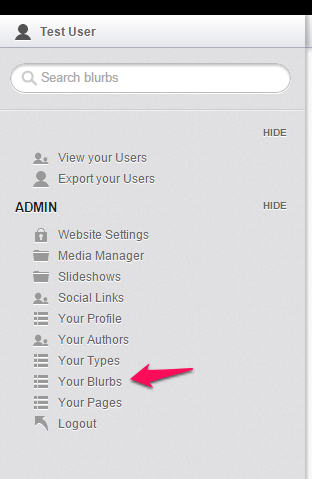
From your Frameworx admin panel, click "Your blurbs" in the left hand navigation pane to access all your blurbs. Some blurbs are pre-setup upon installation and can be edited here.
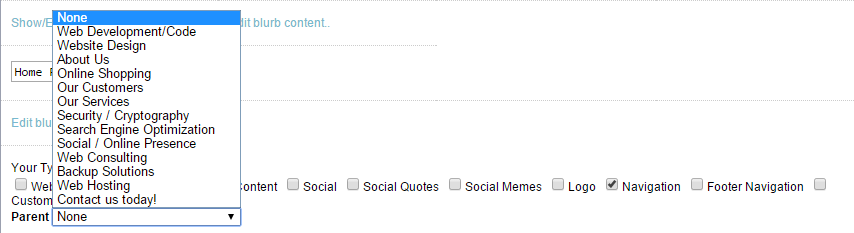
In the blurbs admin section, the first dropdown is your blurb types, setup under "your types" on the left (covered in the "Types" section). You can filter your blurbs by type using this dropdown.
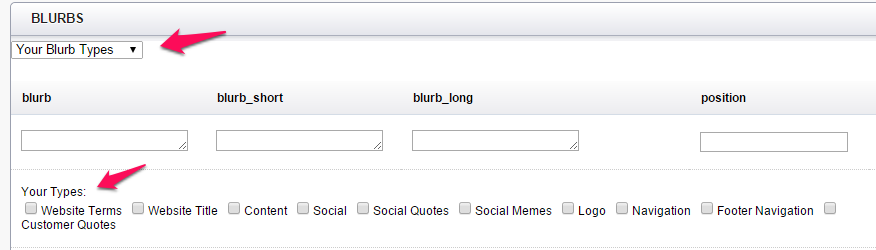
You can add a new blurb in the very first row of a blurb entry. Note that all fields when editing blurb content are required. If you wish to edit an existing blurb, click on "Edit blurb content", or "Edit blurb types" to allocate it to specific types. A description of each field is listed below:


- blurb: This is the default or medium length blurb text you wish to add
- blurb_long: This is the short version of the text you're adding
- blurb_short: This is the long version of the text you're adding
- position: This is the position of the blurb in relation to other blurbs of the same type. It is ordered numerically in ascending order starting from 0. The position is normally used in blurb types such as navigation to determine the order of menu items, or with quotes to determine the order in which certain quotes appear
- slug: This is the unique identifier for your blurb, as a label to identify it. It should usually be lowercase and alphanumeric for best practices. The slug is used if you are embedding blurb content into your various pages using the [blurb] shortcode shown at the bottom of this manual under the "shortcodes" section.
- Your types: These are the blurb types you've setup under "Your Types" for your website to tag each blurb for categorization
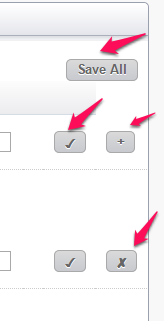
With blurbs, and almost any part of the admin panel, use the + sign to add a new item, the checkmark to save an item, and the "X" to delete an item. You can also use the "Save all" button on top to save all changes if you've modified multiple items.
Some blurb types have special meaning or significance, these are outlined more in the Types section. An example of such a type is "Navigation". Applying a blurb as a navigation label will by default use its short version in your website's navigation menu, and allow you to nest it within another navigation blurb as a subcategory.
Blurbs can be used in any of your pages, or any templates our developers create for you. Please see the pages section for more details on using blurbs within your content. Blurbs can also be viewed individually for SEO purposes. Blurbs can also contain other blurbs which are of type "website terms" to have nested parsing of blurbs.
Types
Types are used when organized or tagging blurbs. Some types are defined by default with the framework installation, and should not be deleted. You can create your own types to tag blurbs into for various purposes depending on your website's needs. User defined types require a developer from MyRamani to make special exceptions or cases based on their types. Default types are pre-defined and used within our pre-defined templates.
Managing Types
The only thing you require for a type is the name of a type, think of this as an equivalent to a "Tag" for a blog post in Wordpress, or a keyword in other CMS platforms. Simply enter the name, and the checkbox to save. 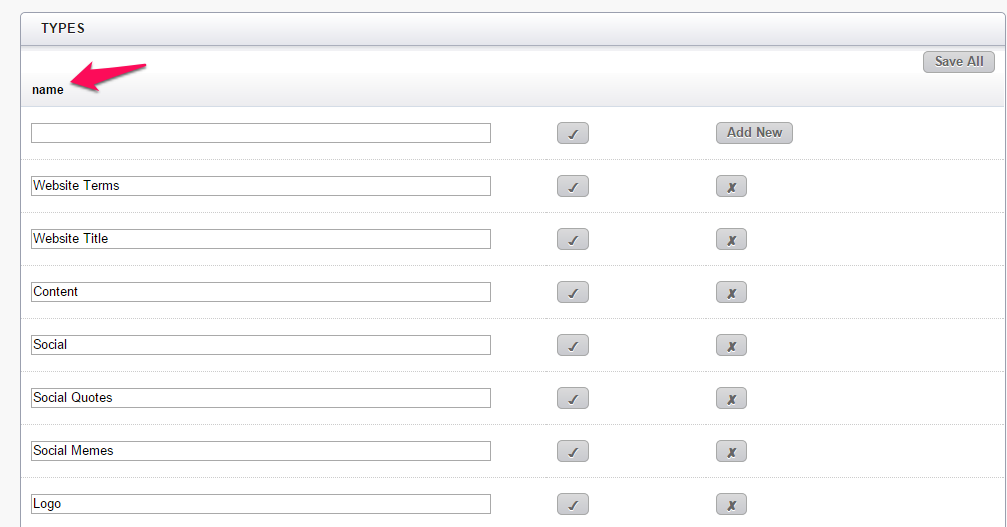
The following is a list of pre-defined types that come out of the box with Frameworx and are used throughout the website in various ways:
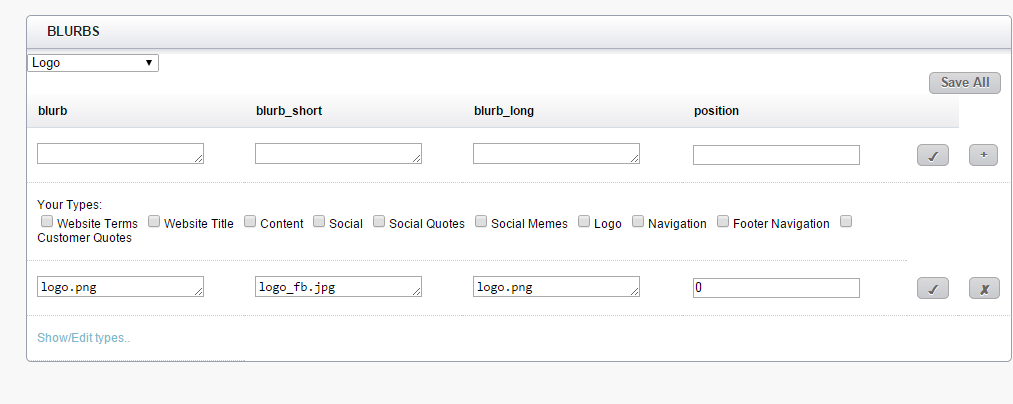
- Logo: This is your website/company's logo. Many companies have different ways of representing their branding, which is where this blurb type comes in. There is and should only ever be one blurb of this type with three different choices of logos. You will first need to upload your logos from the Media Manager and then enter the image names in the blurb content areas. The regular/medium blurb is the name of the default logo you use, on your header for example. The short blurb is the blurb you'd use when sharing information to social media platforms or anything which requires a smaller sized version of your logo, and the long text which can either be the same as your default logo, or a longer version of your logo that can be used in other areas of the website or in your outgoing emails.
- Website Title: This is the name of your company/website which can also be represented in three different ways. Similar to the logo type, there is only ever one blurb allocated to this type. For example, our company chooses to represent its name in three different ways:
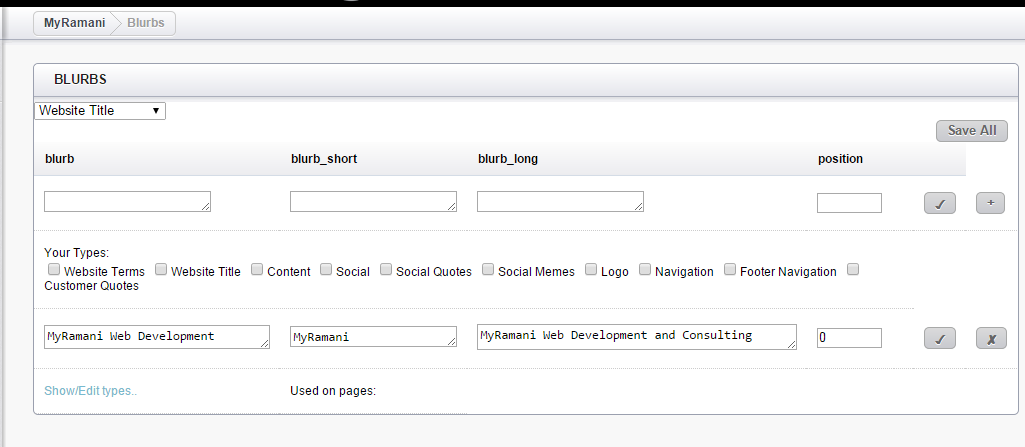
You can set these three to the same term if you do not want there to be a difference anywhere on your website with your company name. - Navigation: This blurb type is used for your navigation menu. Any blurbs tagged as type navigation will have their short version show up in the top navigation menu, and allow you to nest a dropdown style navigation tree for use in your website's header. The medium and long versions can show up in other areas of your website if you please with a designer's aid.
- Footer Navigation: This blurb type is used for your footer navigation menu. Any blurbs tagged as type footer navigation will have their medium version show up in the footer navigation.
- Website Terms: Website terms are common terms used throughout your website such as "contact us", "order now", "email address", "password" etc. You can modify the wording for any of these terms on the fly. Please note that adding additional website terms requires a web designer to display those terms in areas you want. All out of the box terms are displayed in our default templates.
- Content: Any blurbs labelled with type "Content" can be used inline within pages you create in Frameworx. If you wish to use a blurb or term as inline content within your pages, you can tag them as type "Content" for later use.
- Social: Any blurbs labelled with type "Social" can be used within a social media rotator for use with your online presence.
Website Settings
This section handles your global configuration of the website, consisting mainly of default information. It is divided into the subsections "website","social","home","email" and "customer". Each option in the admin panel has helper text next to it so that you can understand in English what it is you're changing. Details on some options are expanded below
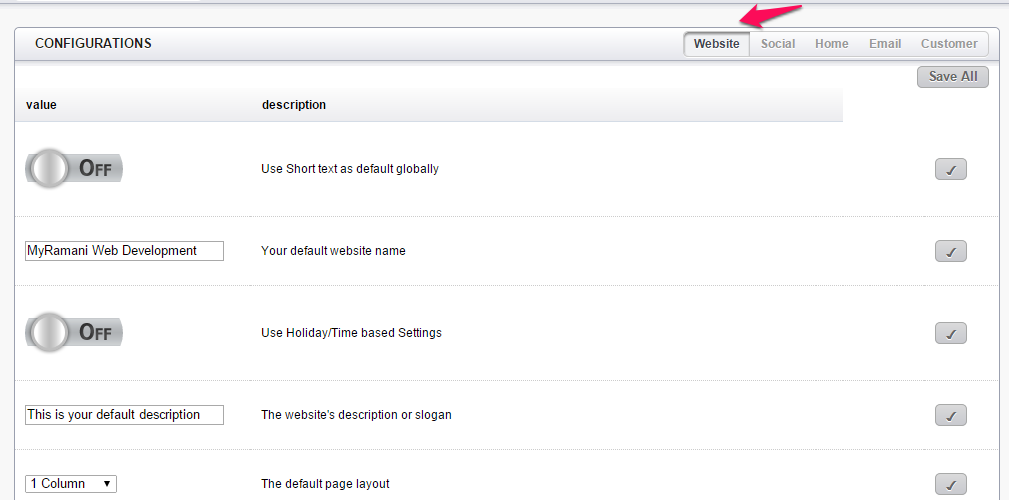
- The "Website" section allows you to edit generic information about your website - the defaulted title, your slogan or catchphrase, what layout your pages should be, whether search engines should crawl your site and other options.
- The "Social" section allows you to enable or disable social connect, which allows your website to integrate directly with your social media outlets, and allows users to login or register to your website via Facebook connect, and whether you want to show sharing icons or a toolbar on your pages so that people can share them easily to their favourite social media outlets.
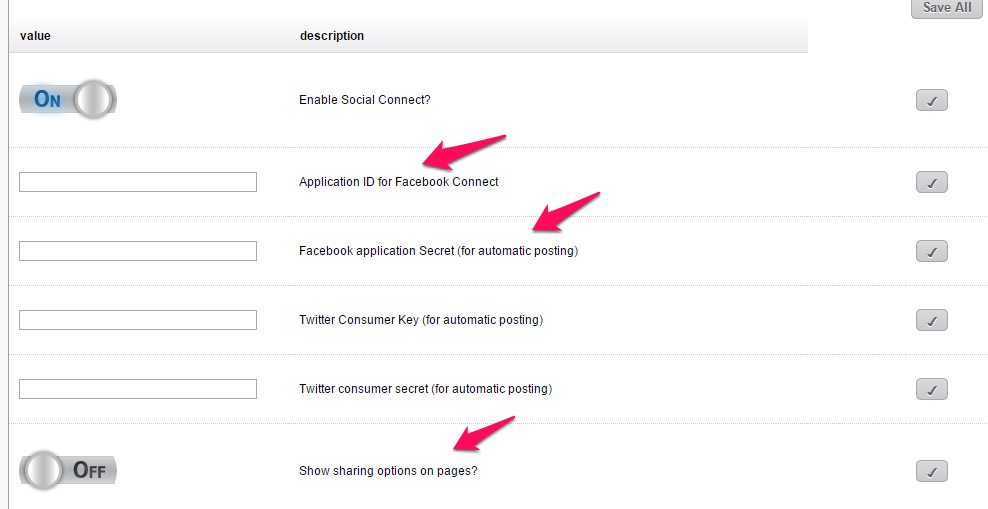
You will need to obtain developer credentials for social media post management. The following links can be used as guidelines for Facebook and Twitter:
Facebook
Twitter - The "Home" section allows you to edit how your home page should look. Besides pulling information from a page created for the home page, you can specify whether you would like a slideshow to appear on top, upload various slides for it, and choose whether you'd like a horizontally cropped image to appear on portrait mode mobile devices, and how big the cropped image on those devices should be in pixels.
- The "Email" section allows you to enter information about your email SMTP server so that our website can send emails on your behalf. You can obtain this information from the company you are hosting emails with currently. This section also allows you to enable newsletter subscription forms in your footer, and have people stay updated with your updates. You can also specify what fields are required fields that users must enter in the contact form when contacting you. This last field is usually reserved for developers, you simply need to let us know what fields you need as required fields
- The "Customer" section allows you to enable customer registration, and/or force registration in order to view the website
Pages
Pages are the content that the end user sees accessed by a link to your website. Pages consist of blurbs, static text, images, videos and any content you'd like. A detailed list of each field and what they are used for can be found below.
- Search for blurbs: This is the area where you can search for and use blurbs that you've already created to fill in some of the content in your page, including your page title and URL for this page. This is where the true beauty of blurbs come in. You can for example, use the "about us" short blurb as the title, and the long version as its content, or the medium one, or a combination of all three. You can also use blurbs on pages with inline editing, meaning that you can make minor text differences to a blurb that apply to a specific page only. This allows you to use slight variations of your content for similar types of pages if needed.
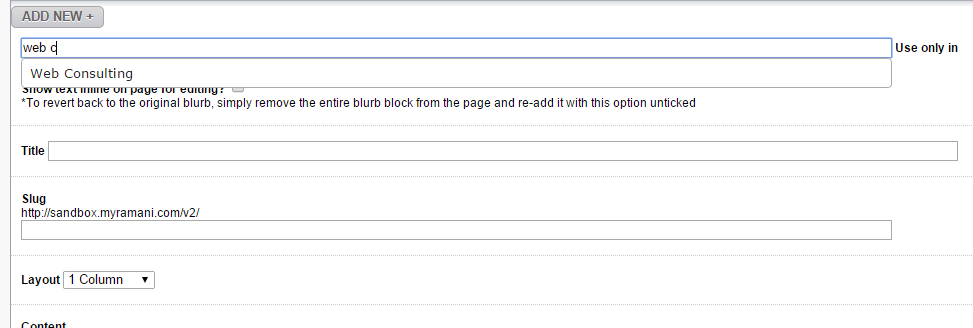
Upon selecting a blurb, it will automatically fill in what are called "shortcodes" (simple tags similar to HTML but specific to a CMS platform) into your content area. The shortcodes fill in the title and URL fields if you've selected to use it in the page title. Everytime you change the blurb, it will change on any pages you've put this blurb in (except in the case of inline editing).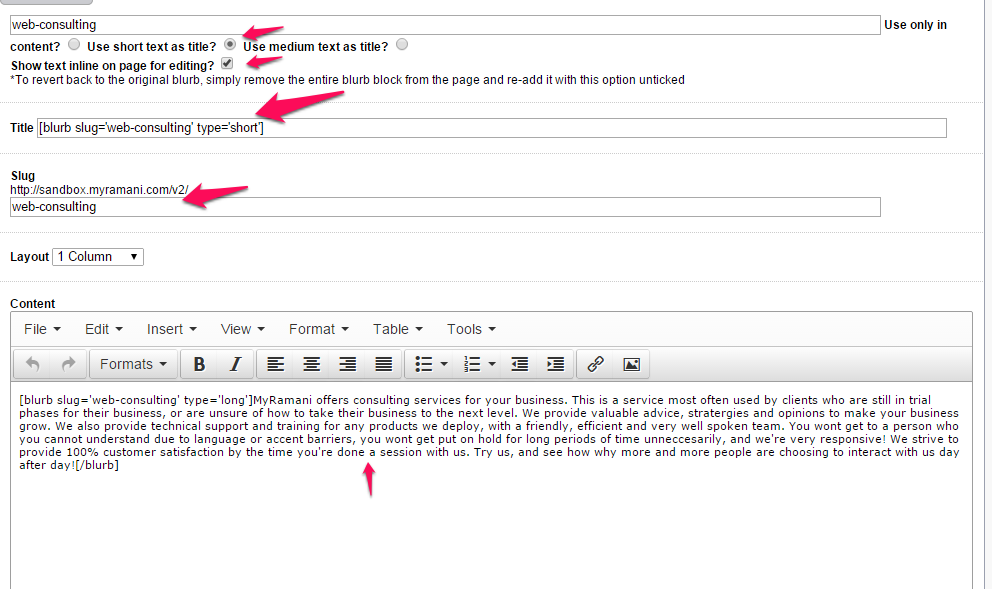
Note: Only blurbs that are of type "Content" are searchable in this area. To ensure that your blurb appears when you search it, you must ensure that it is tagged with the type "Content". Please also note that if you choose to inline edit a blurb, the [blurb] and [/blurb] shortcodes must remain. - Title: This is the title of this specific page. This can also be automatically filled in with a blurb shortcode (see above)
- Slug:This is the link to your page, this is the address people will visit to view this page. You can enter anything you'd like here, though, best practice is to use lowercase letters with alphanumeric characters. Note:The only exception to this rule is the home page, the home page's slug is always set to "home"
- Layout:This is the layout ie the number of columns on this page. Our default templates are divided between 1-5 column templates. If you have a customized design for your website, usually only one of the layouts will be provided and pre-selected for pages. Changing the layout will not adapt your design to that layout without a developer adding support for that layout.
- Predefined template:This option only exists if MyRamani has provided pre-defined HTML snippets that you can easily fill in the blanks for or modify to use on pages. This is especially useful if you plan on making several pages with the same layout, but completely different types of content. By selecting a template from the dropdown, your editor will pre-fill with HTML required to produce a specific look for that page, with text specifying where you should replace with your own custom text or information.
- Content:This is the main content of your page, using the TinyMCE editor to style it in many ways. You can use shortcodes on pages, HTML, images, videos, slideshows and any content you'd like very easily. For a tutorial or demo of the TinyMCE editor, visit this link. For a list of shortcodes that can be used for FrameWork, click here
- Meta Description:This is your page's meta description for SEO purposes. Again, you can use a pre-defined blurb for this by searching it, or type your own
Social Links
In this section, you can enter all your social media links to follow your company on. You can also enter the image name from your Media Gallery as an image to use for this social media type. The position determines the order in which these links show up, in ascending order starting from 0.
Media Manager
In this section, you can upload images and animations required for use on your website in general. This allows you to easily use them in pages, slideshows, social links and several other places. To begin, simply click on "choose files" and select the images you want to upload from your hard drive by holding down the ctrl/command key and clicking on the images you wish to upload. You can also select all in a specific folder. Ensure that only image based media is uploaded otherwise you will get an error.
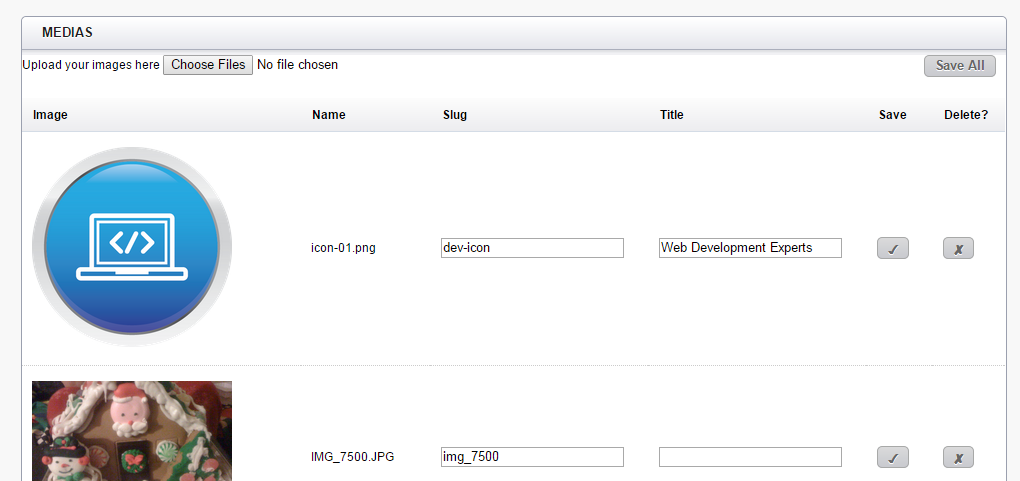
Once the files are uploaded, refresh the page or click "Media Manager" on the left again to see your uploaded images. You can now give each image a title (alt text), and a slug (SEO friendly name for the image). For example, if an image of a wedding cake named IMG_5543.jpg was uploaded, but you wanted links to that image to actually contain the name of what it is, you could make the slug of the image "wedding-cake" and the title of the image "Vanilla and Chocolate swirled wedding cake".
Slideshows
Slideshows allows you to easily embed a slideshow to the top of any of your pages with an easy shortcode (except the home page, which is configured under Website Settings).
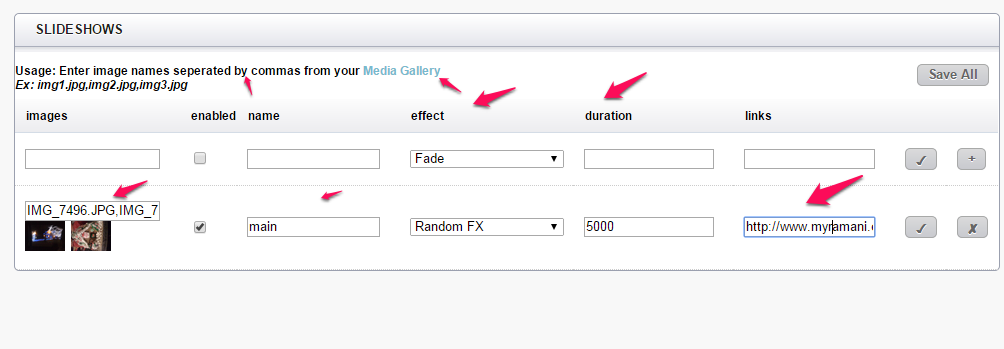
Below is a list of each field in a slideshow, and how to set them up:
- images: These are the names of your images, seperated by commas from your Media Gallery. Remember to use the full name including the extension of the image, and not the slug.
- enabled: Is the slideshow enabled or not?
- effect: This is the effect a user sees when the slideshow transitions to the next slide
- duration: This is the duration of time, in milliseconds, that a slide will appear before moving on to the next one
- links: These are the links that each slide will point to, seperated by commas just like "images" above
Once you save your slideshow and refresh the page, you will see thumbnail versions of your slideshow images if you entered them correctly below the images textbox for each slideshow.
Authors
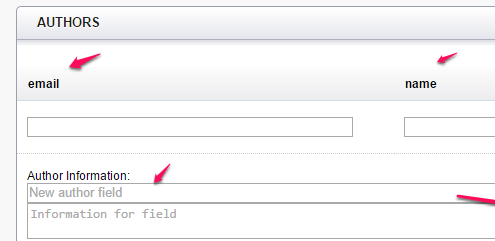
This section allows you to add authors to your website, these authors are simply for informational purposes only and by default they cannot login to your admin panel until you allow them to be editors. An email address, and name are required fields for an author. You can also add an unlimited amount of extra information for an author, whether it be their address, their website, their position, or their full biography, you can accomplish this using authors. Authors appear on your pages with the author shortcode, or within templates that our development team creates for you.
Short Codes
Here's a list of shortcodes you can use in your pages and how they work:
No extra options: image not found
In the example above, the slideshow with the name "slideshowname" will be shown, and it will have the name "slideinfo" for tagging purposes- [blurb]: You can use this shortcode to display any content based blurbs that you've created. You require the slug of your blurb, and the length (short, medium or long). The format as is follows: [blurb slug='welding-experts' type='long
In the example above, the long version of the blurb with the slug welding-experts will be shown
To show a link to the home page, use: https://www.myramani.com/base
The first example above will give you the URL to the page with the slug ecommerce-and-online-stores, and the second will give you a link to the home page.
To show all author attributes, use: